
Cameron Button Up with Collar Modifications
It’s technically spring, but it has been snowing on and off for the past few days here!
But it is getting warmer and the sun stays longer; so even though there’s still snow on the ground, I can’t help but planning on some spring sewing!
Fabric I used
Have you heard of Check & Stripe? It’s a Japanese fabric (craft) store which mainly carries Liberty fabrics and their in-house fabric. They are pretty popular among Japanese sewists!
One of their in-house fabric, The Original Gingham, is a long-seller and comes in so many beautiful hues. Luckily, Ewe Knit carries some of the Check & Stripe products in Canada!
I purchased the pistachio colour of their gingham about two years ago.
It’s a lovely light-weight cotton that is perfect for garment projects. Using this classic fabric, I made a button up shirt.
Pattern
I initially planed on using Archer Button Up by Grainline Studio. But when Helen’s Closet Patterns released the Cameron Button Up pattern, I had to try it!
Cameron is a dartless, boxy loose fit button up pattern that fits many figures and fits folks with or without bust. (I guess the common term for this type of clothing used to be “unisex”, but is “gender inclusive” a better term?)
I'm pretty happy with how it turned out! Even though I went with a different pattern, this turned out almost exactly like how I imagined.
The back has a yoke and a pleat, just like the way I like.
Cameron comes in size 0 (bust/chest: 78.5 cm (31”), waist: 61 cm (24”)) to size 34 (bust/chest: 152.5 cm (60”), waist: 132 cm (52”)).
I love that they offer a wide range of sizes!
Cameron has generous ease and should fit AA-DD cup without adjustment but if you have a bigger cup size, they have a FBA tutorial on their website.
Pattern modifications
You might have already noticed but I did a major design modification to the collar on this one.
I’ve always wanted a button up that had a wider neck opening and lower collar stand that would fit more comfortable for me (who has a short and thick neck).
I find that almost all RTW button ups and even the Archer’s neck openings are a little too snug.
I usually wear button ups with the first button open, so it wasn’t that much of a problem but I always wanted to try buttoning up to the top.
From what I can see on their website, Cameron seemed to have a regular fitting collar. I challenged myself to modify it on my own!
This is a Japanese sewing technical book focused on pattern drafting for tops. I used this book as reference.
The changes I made are:
Widen the neck opening on bodice (both front and back)
To compensate the new lines of the neck opening, I adjusted the lengths of the collar stand and the collar
At the same time, I changed the angle of the curve of the collar stand; it had pretty sharpe curve, so I changed it to gentler curve
Narrowed the collar stand width (so that the collar stand would be less tall)
I’m a self-taught sewist and don’t know much about proper pattern drafting. So these changes were somewhat challenging but I think I managed it ok.
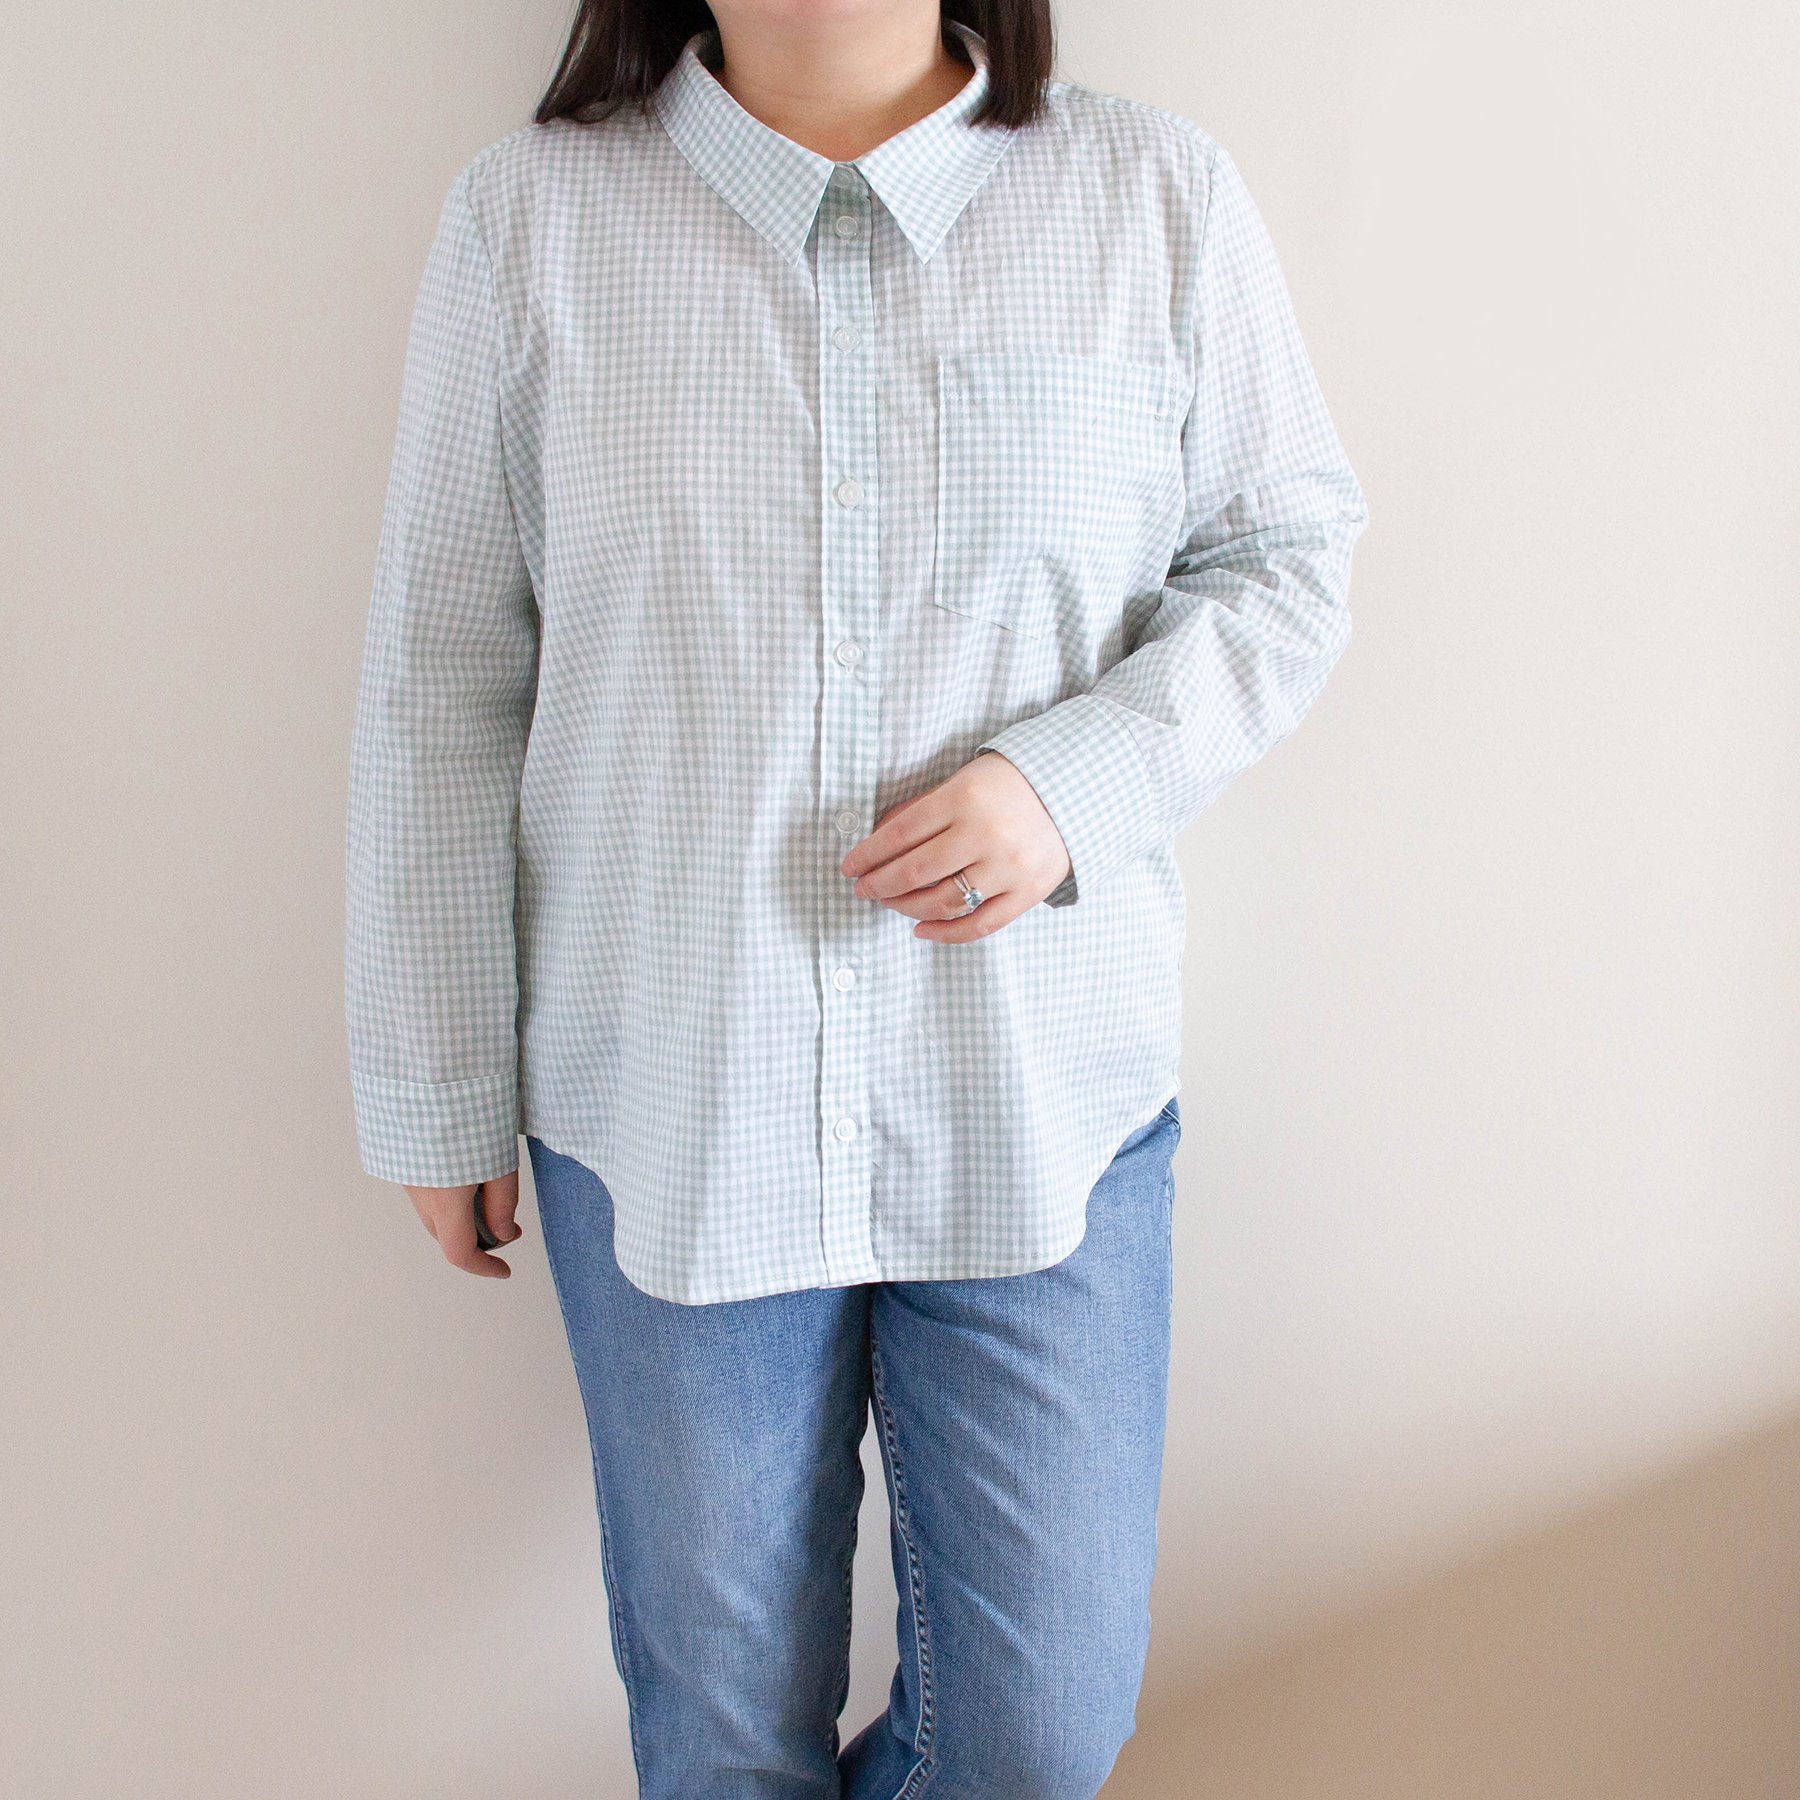
Look! Even when I button it up to the top, there’s still plenty of ease around my neck!
RTW buttons ups almost never have this ease for my neck, I’m so happy to have a shirt that fits my neck comfortably.
If I widened it further, it would start to look less like a classic button up, so I was pretty careful on how much ease I wanted to give.
As well as the widening the neck opening, I think the lowering down the collar stand height helped greatly with the comfort.
I like the look of tall collars, but they are never comfortable to wear for me; if I move my head or tilt it slightly, my chin or head would touch the collar. I find it really annoying and puts pressure around my neck and shoulder.
By lowering down the collar stand height, my chin and head aren’t touching the collar at all. I never knew how freeing this feels!

I think this neck opening/collar works fine with the first button open.
But if I wanted to wear it with two buttons off (open) or completely open in the front as a jacket, I wouldn’t widen it quite as much. In that case, I’d probably focus on lowering down the collar stand height instead.
I’m really happy with this shirt, but looking at these photos, I feel like I didn’t need to widen the neck opening this much. Maybe even more subtle modifications were enough?
I might do further adjustments next time to get the fitting and the design just right!
Sleeves
This cotton is light-weight and is a bit sheer. I could have make this shirt with short sleeves but went for the full length so that I can practice sewing the sleeve plackets!
I believe this is my second time making this type of plackets (my first ones were Kalle shirt).
Archers have “bound sleeve plackets” which is a different look and method of sleeve plackets. Other tops I’ve sewn are often short sleeves, or use seams to create the slits.
Cameron Button Up comes with a great instruction if you’re new to sewing sleeve plackets like me!

It looks cute with sleeves rolled up too! Although, I don’t think I’m supposed to roll them up this neatly, If I wanted to look cool, right? (How do influencers roll them up so naturally without looking too sloppy?)
To sum up…
I made some modifications to the collar/collar stand/neck opening, but other than that I didn’t make much modifications. I just shortened the sleeve lengths and that’s about it!
I think Cameron fits great on me, just as I expected. It’s dartless and has a loose fit which makes the fitting generally easier. I also think that Helen’s Closet’s patterns seem to fit me well.
I love their Gilbert Top (I’m planning on making more this spring/summer), and I tried their Winslow Culottes last year which were great too. (I’ll share about them soon.)
Additional thoughts
Oh I almost forgot! I have two more great things about this pattern I’d like to share with you.
Cameron has a grown-on front, meaning the button bands are grown on continuously from the bodice and not individual pieces. But because of the clever construction, it looks like it has a separate piece, doesn’t it?
Just for this amazing construction alone, I was glad I bought this pattern!
(Not that you have to fold the bodice piece to create the buttons bands, so the pattern matching would be a little bit off there. Personally, it’s such a small difference I don’t mind at all.)
Another great thing about this pattern was how you attached the collar, the collar stand, and the bodice together. There are many ways to do it (just like the buttons bands construction), but the steps shown in the Cameron instruction felt most clear and easy to me.
To be honest, I was hesitant to purchase yet another shirt pattern (I have a few already) at first. But by trying out different patterns, I get to learn different methods and tips like I did with Cameron.
I’m so glad I tried Cameron, it is now one of my favourite patterns! I’m so excited to wear mine.
March 30, 2022